
Top Catcher Drills: Catching Progression for Baseball
If you’re a baseball coach or parent, you know how catchers can spend a whole workout chasing a faster throw to second base, then still lose runs on a ball in the dirt or a pitch they failed to receive cleanly. That is why the best catcher drills start with progression, not chaos.
Catchers need to maintain a cool head while also being confident behind the plate. Whether it’s the infield or outfield, the catching position controls the game regardless of who’s on the field.
A catcher still lives on three core skills: receiving, blocking, and throwing. The difference now is that you can tie each drill to a real benchmark, like quieter glove movement on shadow-zone pitches, cleaner recoveries on blocks, and pop time that actually holds up in game speed.
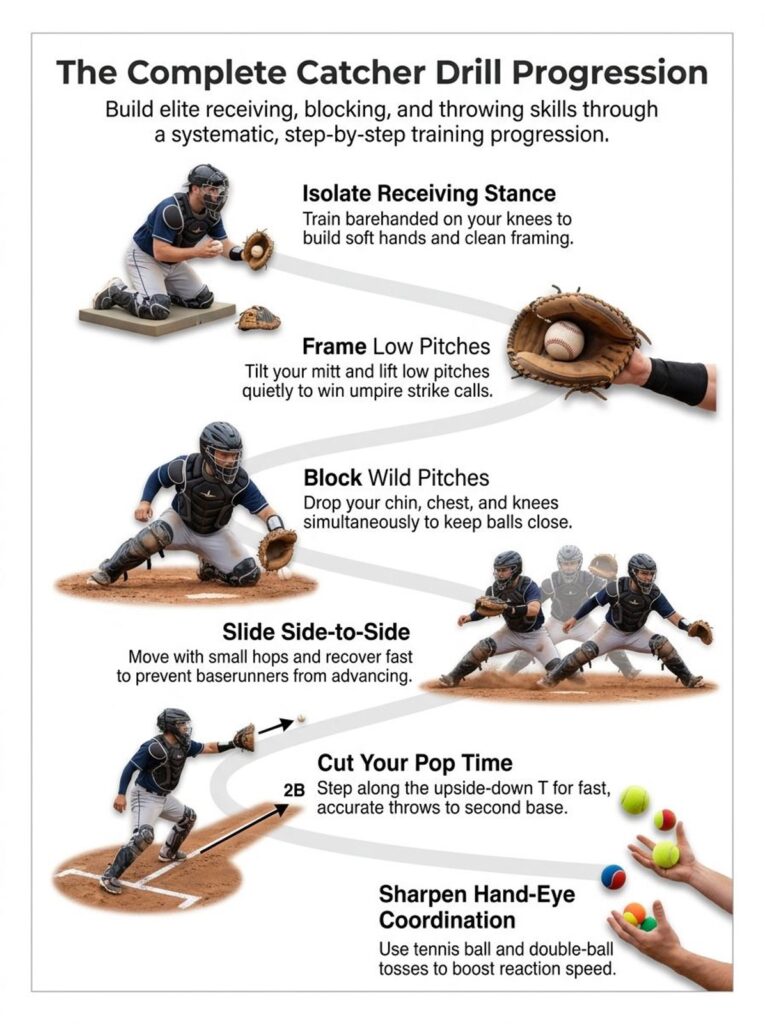
In this guide, you will build the skills mentioned above in order. We will cover receiving drills on your knees, angle receiving, weighted-ball work, blocking progressions, quick throws to second base, pop time drills, and warm-ups that sharpen your hands, feet, and reactions behind home plate.
As a baseball coach, it’s my job to help my players. And as a father to a catcher, it’s my job to ensure my kid gets in the reps he needs to keep progressing behind the plate.
Table of contents
- Key Takeaways
- Why is Catcher Drill Progression Important?
- Top Catcher Drills for Receiving
- Blocking Drills for Catchers
- Throwing Drills for Catchers
- Warm-Up and Coordination Catching Drills
- What Are the Best Tips for Catcher Drills and Progression in Practice?
- Become a Wall Behind the Plate Through Catcher Drills
- FAQs About Catcher Drills
Key Takeaways
- Progression still builds the fastest gains: train receiving, blocking, and throwing in separate blocks first, then blend them in three weekly catcher sessions over 12 weeks.
- Start with kneeling receiving and angle work because Baseball Savant’s catcher stance data showed knee-down setups produced a higher called-strike rate on shadow pitches from 2020 through 2024, 47 percent versus 45 percent, with the same 0.6 passed ball or wild pitch rate per 100 pitches.
- For blocking progressions, measure whether the ball dies in front, not whether it touches your gear. Statcast grades catchers on preventing passed balls and wild pitches, which is why quick recovery and reset matter as much as the first block.
- Train pop time with CATCH, TURN, TAKE, and time it the same way every week. MLB Statcast lists 2.0 seconds as the major league average to second base, and the best 2025 averages were down at 1.86 seconds.

Why is Catcher Drill Progression Important?
Catcher drill progression works because the position asks you to do three different jobs at once. You receive every pitch, block the miss, and still have to throw the ball with clean footwork if a baserunner goes and decides he wants to test your arm (which, by the way, I have a whole article on how to improve throwing speed).
The mistake most players make is mixing all three too early. You get tired, your glove gets noisy, your chest rises on blocks, and your transfer gets long.
Good progression fixes that. You isolate the receiving stance, the blocking position, and the throw to second base first, then combine them after each part looks clean on video and feels repeatable.
Pitch Smart also treats arm care the same way. Its performance guidance says your workload includes everything you throw, warm-up throws, long toss, bullpens, and weighted balls, so quality over quantity is not just coaching language; it is how you stay available.
| Skill | Start with | Add next | What to measure |
| Receiving | Knees, quiet glove, ball in front | Angles, stance changes, live pitch shape | Clean catches and stable presentation |
| Blocking | Drop mechanics and deadened ball | Lateral slides and fast recoveries | How often the ball stays within one step |
| Throwing | Transfer and footwork | Full throwdowns with varied pitch spots | Pop time and throws on the bag |
This step-by-step setup matters even more for youth players who pitch and catch.
Pitch Smart warns that pitcher-catcher athletes were three times more likely to suffer a major arm injury than pitchers who did not also play catcher, so a smart plan protects both your skill work and your arm.
Top Catcher Drills for Receiving

Receiving decides more counts than most players realize. In MLB Statcast’s 2025 framing summary, hitters posted an .806 OPS after a 1-0 count and a .607 OPS after an 0-1 count, so one clean extra strike can change the whole at-bat.
That is why your receiving drills should train touch, timing, and posture before you worry about style points.
A quiet glove helps the umpire, helps the pitcher, and keeps you ready to throw the ball to second base. Receiving the ball is something both young and old players need to continue working on at all levels of baseball.
| Tool | Best use | Why it helps |
| Baseball | Game-speed receiving | Builds true pocket feel and realistic transfer timing |
| IncrediBall or soft training ball | Early touch work | Lets you pile up clean reps without flinching |
| Slightly weighted training ball | Short-range hand and forearm control | Raises demand on the wrist and transfer, if volume stays low |
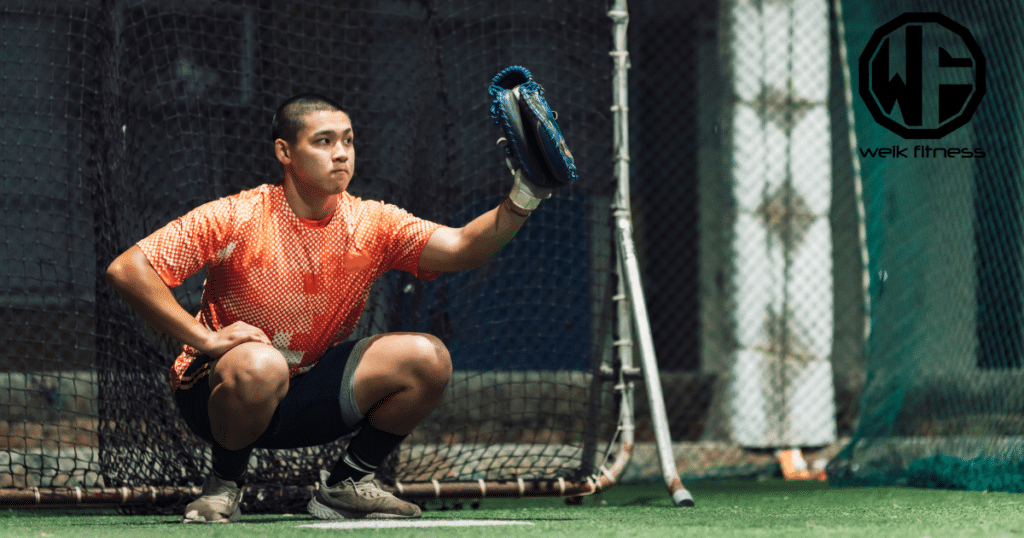
How Do You Practice Receiving on Your Knees?
Start on your knees because it strips away the lower half and forces you to learn what your hands are doing. If the glove is late or stiff here, it will be worse once you stand up and add footwork.
- Begin barehanded. Have a partner soft-toss from a short distance and catch with your bare palm. This teaches touch and keeps you from stabbing at the ball.
- Add the glove next. Set the mitt out in front and keep the wrist loose. Little League’s catching instruction puts a big premium on a quiet glove and minimal body movement.
- Use soft training balls for volume. IncrediBalls or similar soft balls let you pile up reps without tightening your forearm every catch.
- Work low targets on purpose. Put the glove on the ground, then receive up through the ball so you learn to keep the ball in front.
- Mix in glove-side and arm-side misses. A catcher’s hand position gets exposed fast on pitches that are not middle-middle.
- Finish with transfer reps. Catch, move the ball from your glove to your hand, and stop. Do not rush to throw until the exchange looks compact.
A useful cue from catching coaches and players is simple: catch the ball firmly out front, and do not let the pitch drag your hand down.
If you want a clean progression, go 10 barehand reps, 20 glove reps, then 20 reps with a soft training ball. That sequence gives you feel first, then presentation, then good catching endurance for good receiving.
What is Angle Receiving and How Do You Do It?
Angle receiving is how you present pitches at the edges without turning a clean take into a noisy catch. Statcast defines the Shadow Zone as the area one baseball width inside and one baseball width outside the strike zone, which is where receiving skill matters most.
- Get in your receiving position and get your target early, then relax the glove just before the pitch arrives.
- Beat the ball to the spot instead of chasing it late.
- Keep your hand behind the ball on low pitches so the mitt works up through the catch, not sideways.
- Use small pre-pitch movement if it helps you stay loose, then go quiet at contact.
- Train both sides of the plate, because arm-side receives and glove-side receives need different wrist angles.
- Finish balanced, so you can still make a throw if a runner is trying to steal.
A good checkpoint is this: if the mitt is still bouncing after the catch, the umpire sees movement instead of command. A clean presentation looks almost boring, and that is exactly what you want.
How Does Receiving with a Weighted Ball Improve Catch Skills?
A weighted ball can help your hands, forearms, and transfer path, but only when you use it with short distances, low volume, and clean mechanics.
A 2021 review of weighted-ball throwing research found that these programs can improve velocity, but they work best when workload is monitored and excessively heavy balls are avoided.
For catchers, the safest use is short-range receiving or transfer work after a full warm-up. Think 6 to 10 crisp reps, not max-effort throwdowns.
- Use a slightly heavier training ball for short kneeling receives.
- Keep the glove quiet and stop the drill if your wrist starts to collapse.
- Do not turn weighted-ball work into long, hard throws to second base.
- Count those reps as part of your total arm workload, because Pitch Smart includes weighted balls in the throwing load.
A coach or head coach should watch this drill. If the ball weight changes your path or forces a long arm action, the drill has stopped helping.
How Can You Frame Low Pitches Effectively?
Framing low pitches comes down to posture, timing, and a quiet upward finish. Low strikes disappear when your chest rises, your thumb turns under too early, or your glove leaks below the ball.
- Set a target near the bottom of the zone and receive the pitch slightly out front, not under your body.
- Keep the mitt tilted so the pocket works from low to high with a soft wrist.
- Film from the side and from behind, because extra glove pull looks smaller in real time than it does on video.
- Train with soft toss first, then move to live spins or a pitching machine once the movement stays quiet.
- Pair every few framing reps with a catch-to-transfer rep, so you can still throw to a base after a borderline receive.
A practical tip I like here is to work the glove back through the ball toward the pitcher, not down and not across your body. That keeps the presentation cleaner and keeps your hand stronger at contact.
The catcher’s ability to effectively frame can mean the difference between a strikeout and a ball four walk.
Blocking Drills for Catchers
An important skill every catcher needs to possess is blocking behind the plate.
Blocking is how you keep an ugly inning from turning into a crooked number. Baseball Savant’s blocking leaderboard grades catchers on preventing passed balls and wild pitches, and in 2025, the top qualified blocker, Alejandro Kirk, finished at +5 Blocks Above Average with a 94.2 percent block rate on his chances.
That tells you what good blocking really is. It is not a dramatic drop. It is a controlled stop that keeps the ball in the dirt close enough for a fast recovery.
| Difficulty tier | Statcast definition | How to train it |
| Easy | More than 95% block probability | Groove your drop and body angle |
| Medium | 85% to 95% block probability | Add side movement and faster tempo |
| Tough | Less than 85% block probability | Train recovery and deadened rebounds |
How Do You Block Low Pitches Properly?
You need the blocking position ready before the pitch leaves the pitcher’s hand.
Little League’s catcher instruction makes the same point with its action stance: if there are runners on base or two strikes, you have to be ready to block or throw. Here’s a great drill for you to try.
- Start in an action stance with your hips slightly higher than a pure receiving stance.
- Drop the chin, glove, and knees together, not one part at a time.
- Let the glove lead and the body follow so the ball stays centered.
- Exhale as the ball hits you. That helps your body absorb the hop instead of kicking it away.
- Keep your chest over the ball and your shoulders slightly forward so the rebound dies in front.
- Recover right away, find the ball, and reset to the throwing lane.
The best block does two jobs: it stops the pitch, then puts you in position to make the next play.
If you train with a machine, full gear matters. Little League’s safety code says catchers must wear a helmet, throat guard, chest protector, and shin guards, and pitching machines should be operated only by adult coaches. Personally, I’d also recommend a cup (for obvious reasons).
That all being said, if you’ve been in the game for a little while, you know many kids are looking for full sets of gear from brands like All-Star and EvoShield.
What Are the Best Techniques for Lateral Blocking Movement?
Lateral blocking is where footwork shows up. You are not just dropping, you are beating the hop to a spot while staying square enough to keep the ball in front.
- Start from your pre-set stance with your weight centered and your feet active.
- Use a quick side shuffle or short directional hop, then get down.
- Lead with the glove, then bring the chest behind it.
- Keep your eyes on the bounce point, not where you hope the ball ends up.
- Freeze for a second after each rep and check whether your chest, knees, and mask stayed lined up with the ball.
- Recover to your feet in one motion and reset for the next rep.
A strong solo variation is to draw a rough circle around the plate area with your cleat and block your way around it, first clockwise, then counterclockwise. It is a simple drill, and it exposes whether you move better to your glove side or your arm side.
How Is the 3-Ball Blocking Drill Performed?
This drill trains repeated, quick blocks around the plate. It is great because it forces you to stop one pitch, recover, and get ready again without standing tall.
- Set three to five baseballs a few feet apart around home plate.
- Start behind the first ball in a low, balanced stance with your chest protector square.
- Shuffle, drop into the block, then recover to a ready stance.
- Move to the next ball and repeat until you have worked every angle.
- Run the pattern both clockwise and counterclockwise to keep the drill honest.
- Finish each rep by resetting to the throwing lane, because a real catcher has to either block or throw on the next move.
Do not score this drill by effort alone. Score it by whether the ball stayed in front and whether your first recovery step took you back into control.
Throwing Drills for Catchers
Throwing drills matter because the running game punishes slow transfers more than it punishes average arm strength.
MLB Statcast defines pop time from the moment the pitch hits the mitt to the projected arrival at the center of the base, and the current major league average to second base is 2.0 seconds.
The elite end is much faster.
On the 2025 leaderboard, J.T. Realmuto (Go Phillies!) and Patrick Bailey both posted 1.86-second average pop times to second, which shows how much clean feet and quick exchange can buy you.
| Throwing metric | What it means | Useful benchmark |
| Pop time | Mitt to base arrival | 2.0 sec MLB average |
| Exchange | Glove to release | 0.4 to 1.3 sec measured range |
| Arm strength | Velocity on max-effort throws | Helpful, but not enough without accuracy |
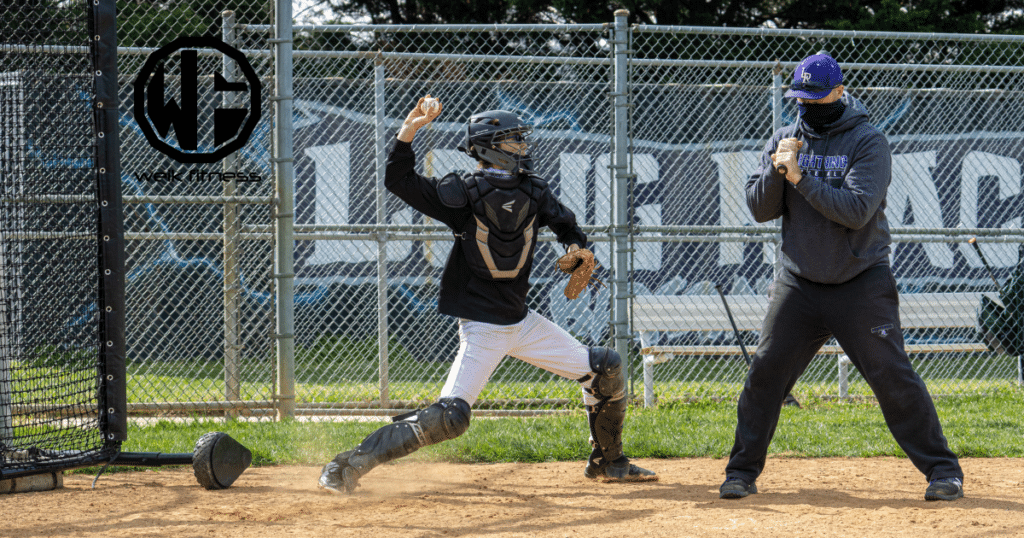
How Do You Practice Throwing to Second Base?
Drills for throwing should focus on clean feet along the upside-down T and the CATCH, TURN, TAKE sequence.
Statcast’s throwing model also bakes in pitch location, runner lead, runner speed, and handedness, which is a good reminder that you should not practice only center-cut pitches.
- Mark an upside-down T on the dirt so your feet have a clear path.
- Catch the ball with a quiet receive, then turn the glove into the transfer without taking it behind your body.
- Grip four-seam as the feet replace and line up the throw.
- Throw through the bag, not just at it, with a compact arm path.
- Mix in high, low, glove-side, and arm-side pitches so that the transfer stays game-real.
- Use a stopwatch or video and time the drill the same way each week.
If you want a pro tip that shows up all the time in catcher feedback, it is this: the ball should move on the shortest path from the mitt to your throwing hand. The longer that transfer travels, the more pop time you leak.
What Are Quick Pop Time Drills and How Do They Help?
Quick pop time drills train your full move, receive, exchange, feet, and release, under a clock. They help because they show you where the real problem lives.
If your arm is strong but your time is slow, the issue is often in the feet or transfer. If your stopwatch is fine but the throw sails, your lower half probably rushed ahead of the hand.
- Run 5 to 8 timed reps from normal game stance.
- Alternate pitch spots, so you learn to throw from imperfect receives.
- Review one slow rep and one fast rep on video after each set.
- Stop the set if accuracy starts to collapse, because bad fast reps teach bad patterns.
Hit the target, move quickly, then throw. Fast and wild is still losing baseball.
How Can You Improve Throwing Accuracy to Bases?
Accuracy starts with precise footwork and a clean transfer.
MLB’s arm-strength glossary makes the point clearly: Catcher arm strength is measured from max-effort throws, but velocity alone does not make a good throw; accuracy and trajectory still decide the out.
- Use the Feed The Hand drill every day to train exact glove-to-hand placement.
- Lay out a tic-tac-toe grid or simple foot markers behind the plate to rehearse where your feet land.
- Practice inside, middle, and glove-side receives separately so you learn the right first step for each.
- Keep the transfer in front of your chest. Do not sweep the glove behind your body.
- Throw to a small target, not a big net opening, if you want your misses to shrink.
- Build your accuracy into full reps by finishing every few throwdowns with a tag-height target at the bag.
One overlooked tip from experienced catchers is to let the ball travel close enough to your chest that the transfer stays tight, then snap the glove back to the throwing hand. That move shortens the route and steadies your release.
Warm-Up and Coordination Catching Drills
Your warm-up should prepare the skill you are about to train.
In the current Pitch Smart preseason throwing program, the first step is interval throwing with a purpose, gradually building distance and intent, then making ten throws at your farthest comfortable distance before working back in.
That same idea works for catchers. Start with easy hand speed and shoulder activation, then move into catcher drills that sharpen tracking, exchange, and body control.
| Warm-up tool | Best use | Why it earns a spot |
| Tennis ball | Vision, tracking, soft hands | Safe, cheap, and perfect for high-rep reaction work |
| SKLZ Reaction Ball | Random bounce reads | Its uneven shape creates unpredictable hops that sharpen reaction time |
| JUGS Lite-Flite ball | Machine-fed receiving and blocking | JUGS designs it to simulate a real pitch without the sting |
How Do Crosses with a Ball in Each Hand Enhance Coordination?
This drill forces your eyes, hands, and lower half to work together. It is one of the easiest ways to wake up coordination before heavier catching drills.
- Hold a ball in each hand and toss both at the same time.
- Catch them with crossed hands or opposite hands, then reset fast.
- Stay in a squat or athletic stance so your trunk and hips stay active.
- Work short sets of 10 to 20 reps to keep speed high.
- Add random voice cues from a catcher or coach so that the drill feels less scripted.
- Finish with 2 or 3 reaction-ball catches if you want an extra vision challenge.
These reps will not replace receiving or blocking, but they make your hands quicker before the harder work starts.
What Are Tennis Ball Reaction Drills and Their Benefits?
Tennis ball reaction drills build fast eyes and safe volume. They are great catcher drills for young catchers because you can train reflexes hard without taking repeated shots off the chest protector.
- Use a partner or racket to send short hops and odd spins at the catcher.
- Kneel or squat and track the ball all the way into the glove.
- Mix straight hops with angle hops off a wall to force quick reads.
- Add a fake transfer or foot replacement after the catch to connect hand speed to throwing.
- Use them early in the workout for warm-up, or late in the workout for competitive reaction sets.
If you switch from tennis balls to a pitching machine or harder training balls, treat it like real catcher work. Little League’s safety code requires full catcher’s gear during practices and games, and machine work should stay under adult coach control.
What Are the Best Tips for Catcher Drills and Progression in Practice?
You need a plan that helps you improve without running your body into the ground. The best practice setup gives each skill its own space, then blends them once the pieces look the same under speed.
- Split the week by priority. Make one session receiving-heavy, one blocking-heavy, and one throwing-heavy, then end each workout with a short mixed phase.
- Use video for one thing at a time. On receiving day, check glove movement. On blocking day, check chest angle and rebound distance. On throwing day, check transfer path and feet.
- Keep weighted-ball work small. Use it after a full warm-up and count it in your throwing load.
- Train the ugly pitches. Catchers do not get middle-middle in games all day, so your catcher drills should include high misses, balls in the dirt, and tough arm-side receives.
- Protect pitcher-catchers. As of the 2026 Little League regular-season rules, a player who catches four or more innings in a game cannot pitch that day, and a player who throws 41 or more pitches in a day cannot catch later that day unless the threshold exception applies.
- Track two numbers. For blocking, track how often the ball stays in front. For throwing, track pop time and throws on target, not speed alone.
- Build in recovery. Full-speed catcher work beats up the hips, knees, and throwing arm, so shorter high-quality sets usually help more than marathon bullpens behind the plate.
If you want a simple 12-week structure, use Weeks 1 through 4 to lock in receiving and stance, Weeks 5 through 8 to raise blocking range and recovery, then Weeks 9 through 12 to blend transfer speed, footwork, and live throwdowns.
Become a Wall Behind the Plate Through Catcher Drills
The best catcher drills do not live in isolation. Start with clean receiving, add controlled blocks that keep the ball in front, then build the transfer and footwork that let you throw to second base with intent.
Stay consistent, track your reps, and let progression turn good practice into game-ready work behind the plate. Also, be sure you’re making arm recovery a priority.
As a side note, if you are a brand that sells baseball gear (gloves, bats, catcher’s gear, elbow/ankle guards, training aids, etc.), we would love to work with you on content and get your products featured. If you’re open to it, please contact us and let’s discuss how we can get your baseball products in our content.
FAQs About Catcher Drills
They build quick feet, fast transfers, and sure blocks. Coaches want shorter pop times and cleaner throws.
Short transfer reps and rapid foot-step drills help. Throw from the squat, step hard to the target towards second, and keep the throw compact.
No, arm strength helps, but footwork and transfer beat pure power. Teams track pop time and throw accuracy, and data show quicker transfers win more outs.
Start with short reps, then add live throws and game-like feeds. Track progress, give clear cues, and raise intensity as skill improves.


*Disclosure: This article may contain affiliate links or ads, which means we earn a small commission at no extra cost to you if you make a purchase through these links. These commissions help support the operation and maintenance of our website, allowing us to continue producing free valuable content. Your support is genuinely appreciated, whether you choose to use our links or not. Thank you for being a part of our community and enjoying our content.
PLEASE CONSIDER SHARING THIS ON YOUR SOCIAL MEDIA TO HELP OTHERS LEARN MORE ABOUT THIS TOPIC.