
A Complete Guide to Stippling a Gun: Customize Your EDC
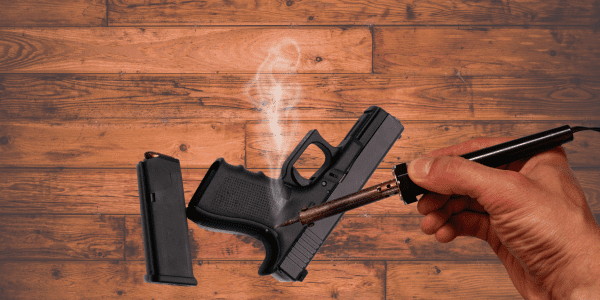
Ever felt your firearm slipping from your sweaty hands at the range or in a tense situation? I’ve been there too, and I realized that some guns just don’t provide the firm grip we need. Stippling a gun, and melting tiny holes into the polymer frame of a handgun for better traction, can be an excellent solution to this issue. Not everyone is looking to get a hand stippling job done on their firearm since it’s permanent, but I prefer it.
I prefer stippling a gun so much so that I actually stippled all the Glocks I own (because if you own a Glock, you know their minimal stippling and texturing is horrible). Thus far, I haven’t needed to stipple my Sig, but we’ll have to see how the grip fairs after thousands of rounds.
Related Article: Build Insane Grip Strength with These 5 Strategies
All that being said, in this article, we will dive deeper into the process of stippling a gun — trust me, you’ll never have to worry about that slippery grip again if you decide to move forward with a hand stippling job!
Truth be told, a hand stippling job isn’t that hard to do yourself. If I can stipple a gun, you can too, and below is how you can as well. Just note, if you mess up, you’ll end up completely ruining your gun and will need to purchase a new frame/grip (so be warned!).
Key Takeaways
- Hand stippling a gun involves melting tiny holes into a gun’s polymer frame to improve grip.
- Tools needed for stippling a gun include a soldering iron or wood-burning tool, sandpaper or abrasive pad, masking tape, and optional stencils or design templates.
- The step-by-step process of a hand stippling job includes preparing the gun and workspace, marking the areas to be stippled, heating the tool, applying stippling, and testing the grip.
Disclaimer: Stippling a gun may void the warranty, so be sure to understand the risk you’re taking. Also, you should stipple a gun at your own risk. Thinning the grip could lead to a failure and even completely destroy your frame to the point it is unusable. If you do not trust yourself or don’t have the time or desire to stipple a gun yourself, you can always hire a trained professional who does it for a living.
Table of contents
What is Stippling on a Gun?
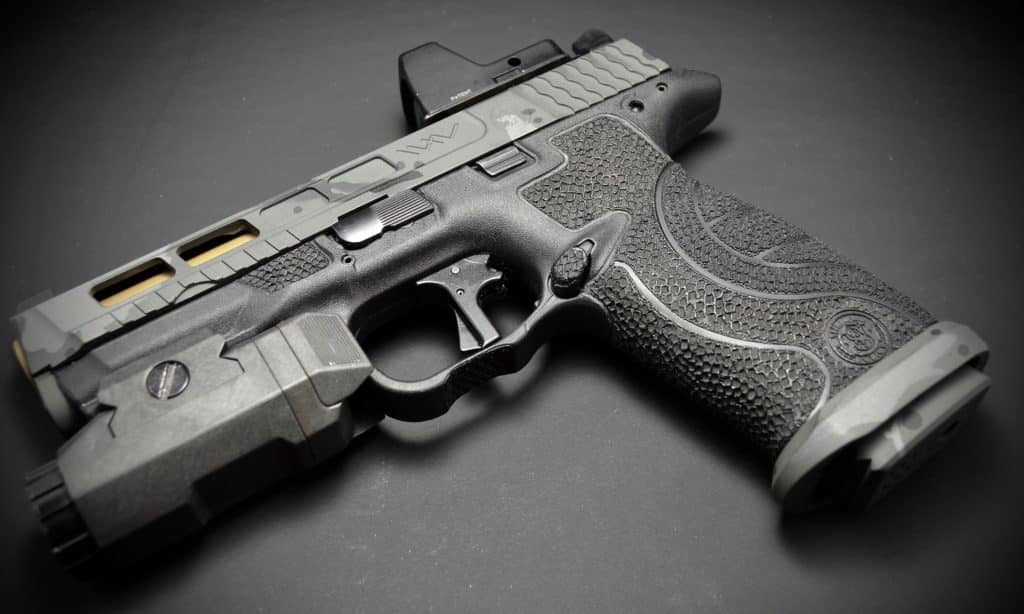
Stippling on a gun refers to a modification made to the grip or frame of a firearm, typically handguns, to improve the texture and grip for the shooter. Stippling involves creating a pattern of small, textured dots or indentations on the surface of the gun’s grip area.
This texture and stippling on a gun provides several benefits:
- Enhanced Grip: Stippling increases the friction between the gun and the shooter’s hand, improving overall grip and reducing the chances of the gun slipping or shifting during firing.
- Recoil Control: A more secure grip can help the shooter maintain better control over the firearm, especially during rapid or repetitive firing, which can contribute to improved accuracy and recoil management.
- Comfort: While stippling adds texture, it is typically not overly aggressive. Shooters find stippled grips more comfortable than smooth ones, especially in adverse conditions like rain or sweat.
- Customization: Stippling can be customized to the shooter’s preference, with different patterns and densities of dots or lines. Some people choose to incorporate designs or logos into the stippling for aesthetic purposes.

It’s important to note that stippling on a gun should be done by a skilled gunsmith or professional who is familiar with firearm modifications. Care must be taken not to weaken the structural integrity of the gun, as improper stippling on a gun could affect the firearm’s safety and function.
Additionally, stippling a gun may alter the gun’s resale value and could potentially void warranties from the manufacturer, so gun owners should consider these factors before making any modifications to their firearms. Laws regarding firearm modifications may vary by location, so it’s important to be aware of and comply with local regulations before thinking about a hand stippling job.
Tools and Materials Needed for Stippling a Gun
To stipple a gun, you will need a soldering iron or wood burning tool, sandpaper or abrasive pad, masking tape, and optionally a stencil or design template for guidance.
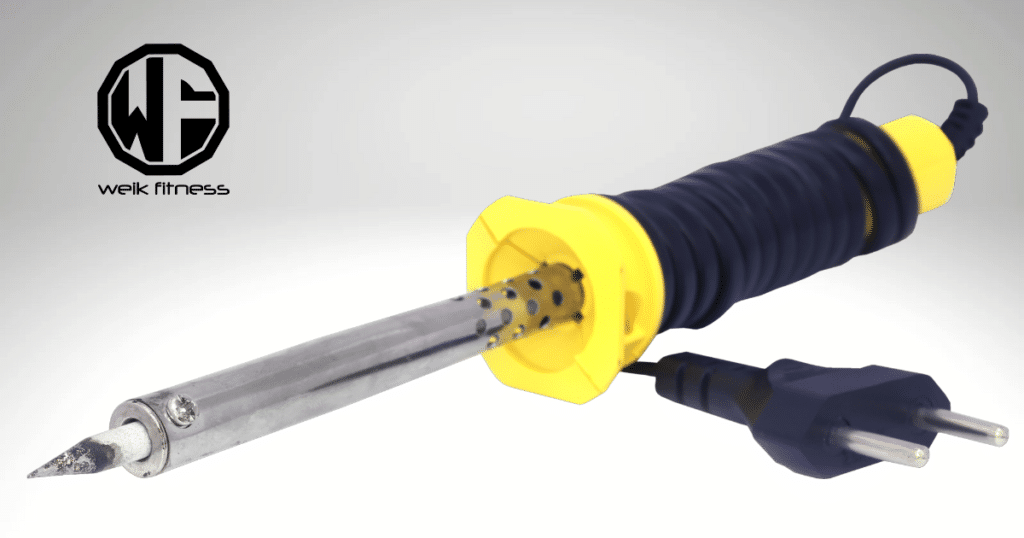
Soldering iron or wood-burning tool
Choosing between a soldering iron or wood-burning tool is key for stippling a gun. They are the primary tools used to melt tiny holes into your polymer firearm frame to create that coveted textured surface.
Many people prefer using a soldering iron because it provides precision and heats quickly, ensuring efficient work. But don’t worry, if you only have access to a wood-burning tool (like me), it does the job just as well! Whichever you choose, make sure its tip is sharp and clean for high-quality stippling results.
Don’t forget, this process needs patience — rushing could lead to an uneven texture or even damage your handgun’s grip! Be prepared for serious focus while wielding these powerful tools.
(Note: Do not attempt stippling a gun without proper ventilation due to potential fumes from melting polymer.)
Sandpaper or abrasive pad
In the process of stippling a gun, you’ll find a sandpaper or abrasive pad to be an essential tool. They serve multiple purposes in preparing your firearm for modification. First off, using these tools helps to clear away any existing texture on the polymer frame of your handgun before incorporating new stippled patterns.
This initial smoothening ensures that the surface melts evenly when you apply heat with your soldering iron or wood-burning tool.
Another important use of sandpaper or abrasive pads involves fine-tuning the grip after completing the stippling job on your weapon. Once cooled, you can gently scrub over areas where you need reduced texture until you achieve desired results.
In situations where traction seems too aggressive or if any sharp edges are present upon melt cools down, smoothing them out becomes easier with these tools at hand. However, proceed carefully, as excessive rubbing could wear down and diminish some finely crafted stipple work!
Masking tape
Masking tape plays a vital role while stippling a gun. It’s used to mark off the area you want to texture, leaving the other parts of your gun untouched. Think of it as creating boundaries for your masterpiece.

You apply it around areas where you’re going to make those tiny holes with your hot tool. This helps maintain a clean, professional look when you remove the tape after finishing the process.
Masking tape not only guards against accidental slips but also allows you to create customized designs on your gun’s grip if creativity strikes! Just remember that precision is key when placing it. Slip-ups can affect how well you carry out this modification on your stippled gun!
Stencil or design template (optional)
Some people prefer adding a personal touch to their stippled guns by using stencils or design templates. While this step is optional, it can make your gun truly unique and showcase your style. Stencils are especially helpful if you want a specific pattern or design on your firearm’s grip.
Personally, I have never used a stencil while stippling a gun, but I understand it can be helpful if you require some guidance or want a specific design.
Simply place the stencil over the marked areas and carefully stipple around it with the hot soldering iron. This way, you can achieve precise and consistent patterns every time. Whether you prefer a simple texture or an intricate design, using stencils or design templates allows for endless possibilities when stippling a gun.
Step-by-Step Guide to Stippling a Gun
Prepare the gun and workspace, mark the areas to be stippled, heat the soldering iron or wood-burning tool, apply stippling to the marked areas, test the grip, and make adjustments if necessary.
Are you interested in learning more? Keep reading!
Prepare the gun and workspace for your hand stippling job
To start stippling a gun, make sure you have all the necessary tools and materials ready. Get your soldering iron or wood-burning tool, sandpaper or abrasive pad, masking tape, and any optional stencils or design templates you want to use.
As for the workspace, find a well-ventilated area with good lighting where you can safely carry out the stippling process. Make sure to clear away any clutter and have a clean work surface.
It’s important to prepare both your gun and workspace properly before beginning the actual stippling process.
Mark the areas to be stippled
I mark the areas to be stippled by carefully identifying the sections on the polymer frame of my handgun that require improved grip. This step is crucial in ensuring that I achieve the desired results and create a textured surface where it’s needed most.
Related Article: The Ultimate How-To Guide for P80 Frames
With precision and attention to detail, I make clear markings on the grip using a pen or marker, indicating exactly where I will apply stippling with my wood-burning tool. By marking these areas beforehand, I can confidently proceed to the next step of enhancing my firearm’s grip.
Heat the soldering iron or wood-burning tool
To begin stippling a gun, you’ll need to heat up your soldering iron or wood-burning tool. This is essential for melting the polymer and creating a stippled texture on the grip.
Make sure to follow the manufacturer’s instructions for heating up your tool properly and ensure that it reaches a suitable temperature for stippling. Once heated, you’ll be ready to move on to the next step in creating a better grip for your firearm through a hand stippling job.
Apply stippling to the marked areas
To apply stippling to the marked areas, carefully heat up your soldering iron or wood-burning tool. Once it’s hot enough, firmly press the tip of the tool onto the marked sections of your gun’s polymer frame.
The heat will melt tiny holes into the surface, creating a textured grip. Take your time and be patient with each stipple, ensuring that you create consistent and evenly spaced patterns.
Remember to test the grip as you go along and make any necessary adjustments for optimal traction. With this step complete, your gun will have an enhanced grip that improves control and handling in any situation.
Test the grip and make any necessary adjustments
To ensure that the hand stippling job has achieved its intended purpose of improving your firearm’s grip, it is important to test it out. Hold the gun firmly and assess how well your hand grips the stippled areas.
Pay attention to any discomfort or slippage that you may experience during this test.
If you find that the grip does not provide enough traction or feels uncomfortable, don’t worry! You can make adjustments to achieve the desired result. This might involve adding more texture in certain areas or smoothing out overly aggressive stippling.
Remember, stippling a gun is a skill that requires practice and patience. It’s okay if it takes a few tries before you get it just right. The goal is to create a comfortable and secure grip that suits your shooting style and preferences.
Tips and Safety Precautions for Stippling a Gun
Take your time, practice on scrap polymer, and prioritize safety with proper ventilation and equipment to ensure a successful stippling job. Read on for more tips and precautions!
Take your time and practice on a scrap piece of polymer
It’s important to take your time and practice on a scrap piece of polymer before you start stippling a gun. Stippling requires careful attention and skill, so it’s best to get comfortable with the technique first.
By practicing on a scrap piece of polymer, you can experiment with different pressures and patterns to achieve the desired texture for your grip. This way, you can make any necessary adjustments without risking damage to your actual firearm.

Remember, patience is key when it comes to stippling, so don’t rush the process!
Use proper ventilation and safety equipment when stippling a gun
I always prioritize safety when stippling a gun. Working in a well-ventilated area is important to prevent inhaling fumes or potentially harmful particles. I make sure to wear a dust mask or respirator, as well as eye protection, to protect myself from any airborne debris.
Safety should never be compromised, so taking these precautions is crucial throughout the entire stippling process.
Avoid overheating or melting the polymer when stippling a gun
To prevent any damage to the polymer frame of your handgun, it’s crucial to avoid overheating or melting it when stippling a gun. The soldering iron or wood-burning tool used for a hand stippling job can reach high temperatures, so it’s essential to exercise caution and control.
By being mindful of the heat applied, you can achieve the desired texture without causing any harm. It’s important to remember that excessive heat can weaken the polymer, compromising its durability and structural integrity.
So, take your time and work in small increments, allowing the polymer to cool down between applications. Proper technique and patience will ensure a successful stippling job while preserving the quality of your firearm.
Consider professional stippling services if unsure or inexperienced
If you’re unsure or inexperienced when it comes to stippling a gun, it may be worth considering professional stippling services. Stippling requires the right tools, technique, and patience to be done correctly.

A professional can ensure that the job is done safely and effectively, giving you a customized grip texture without any mistakes or mishaps. They have the experience and expertise needed to create an optimal grip for your firearm.
So, if you’re not confident in your hand stippling job abilities or want a flawless result, seeking out professional help to stipple a gun is a smart choice. Better safe than sorry!
Are You Ready to Start Stippling a Gun?
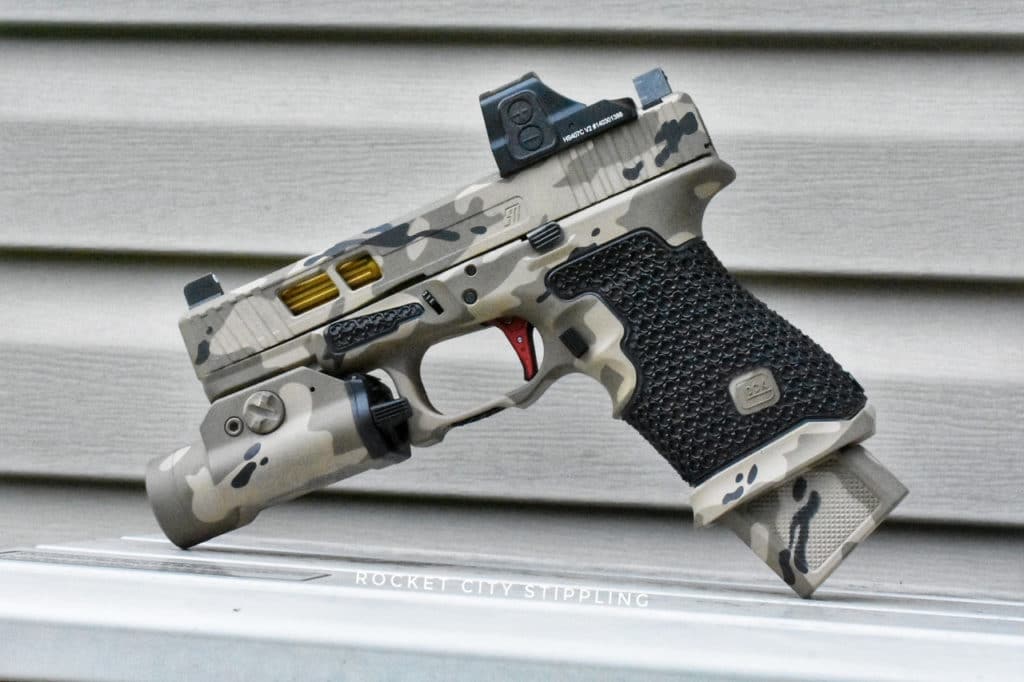
Enhance your gun’s grip and take control with stippling. By carefully melting tiny holes into the polymer frame, you’ll create a textured surface for better traction in any condition.
Related Article: A New Firearm Buyer’s Guide to Choosing an EDC Pistol
Stippling a gun is a popular modification that allows you to customize your firearm and improve your shooting experience. So, grab the tools, practice on scrap pieces, and get ready to take your gun grip to the next level.
As a side note to close out this article, if you want to support our website and are in need of any tactical gear (or any product for that matter), anything you purchase using our Amazon link will provide us with a small commission. We don’t charge for our free content and our goal is to keep it that way. We don’t have a Patreon account to put things behind a paywall, nor do we sell pics of our feet on OnlyFans.
If you choose to use our link and make a purchase (at no additional cost to you), we greatly appreciate your support as it helps us continue to publish free content (like this article) on our website.
We have also partnered with CCW Safe. It’s the concealed carry coverage that I personally have for myself and my family in the event we need to defend our lives. I’ve trusted their coverage for over a decade and have no regrets. Feel free to use our CCW Safe link to sign up and get some coverage to protect yourself and your family.
Also if you have a product you would like us to check out and potentially review, please contact us and let’s discuss.
Stippling a Gun FAQs
Stippling on a gun refers to the process of creating textured patterns or dots on the grip of a firearm using a heated tool.
People choose to stipple their guns for improved grip and control, especially in wet or sweaty conditions, as it provides better traction and reduces slippage.
Yes, you can stipple your own gun at home if you have the proper tools and knowledge. However, it should be noted that improper technique can damage the firearm or affect its functionality.
No, once a gun has been stippled, it is not easily reversible. The texture created by stippling cannot be removed without altering the appearance and integrity of the grip.


*Disclosure: This article may contain affiliate links or ads, which means we earn a small commission at no extra cost to you if you make a purchase through these links. These commissions help support the operation and maintenance of our website, allowing us to continue producing free valuable content. Your support is genuinely appreciated, whether you choose to use our links or not. Thank you for being a part of our community and enjoying our content.
PLEASE CONSIDER SHARING THIS ON YOUR SOCIAL MEDIA TO HELP OTHERS LEARN MORE ABOUT THIS TOPIC.