

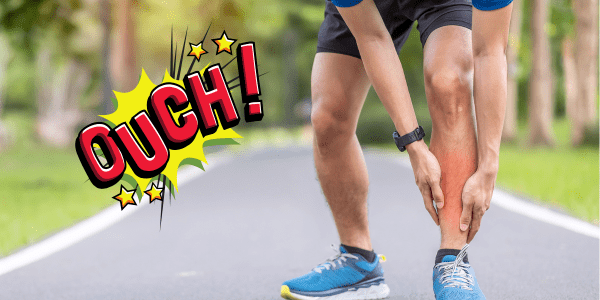
How to Effectively Utilize Stretches for Shin Splints
Shin splints can bring your active lifestyle to a screeching halt. This sharp, debilitating pain along your shinbone is more than just an annoyance; it’s a clear signal from your body to pay attention. Many people hope the pain will just vanish, but targeted stretches for shin splints can offer a much faster and more effective path to relief.
As a certified strength and conditioning coach, I’ve seen countless athletes sidelined by this common injury. The good news is that you have the power to both treat and prevent it.
This guide will show you exactly how. We’ll explore what shin splints are, the underlying causes, and the most effective stretches to get you back on your feet, pain-free.
Disclaimer: This article is for informational purposes only and is not meant to treat or diagnose any condition. It is recommended that you speak with your doctor before engaging in an exercise program as well as if you feel you suffer from shin splints.
Table of contents
Key Takeaways
- Shin splints, or medial tibial stress syndrome, are an overuse injury caused by repetitive stress on the shinbone and surrounding tissues, common in runners and military recruits.
- Key causes include increasing workout intensity too quickly, improper footwear, overpronation (feet rolling inward), and weak lower leg muscles.
- Effective stretches target the calf muscles (gastrocnemius and soleus) and the shin muscle (tibialis anterior) to improve flexibility and strength.
- Prevention is crucial and involves gradual training progression, proper footwear, strength training for the lower legs, and adequate recovery.
- If pain persists for a few weeks despite rest or is severe, it’s important to see a doctor to rule out a stress fracture.

What are Shin Splints?
Shin splints are no joke. Medically known as medial tibial stress syndrome (MTSS), this condition is an overuse injury characterized by a throbbing or aching pain along your shinbone (the tibia). It’s one of the most common issues I see with athletes, especially those involved in activities with repetitive impact.
This condition is incredibly common among runners, accounting for 13.6% to 20% of all running-related injuries. It’s also prevalent among military recruits, where some studies show an incidence rate as high as 35%. The pain occurs when the muscles, tendons, and thin layer of tissue covering the bone become inflamed from repeated stress.
If you’re dealing with this, you’re not alone. The good news is that with the right approach, including specific stretches for shin splints, you can effectively manage the pain and prevent it from coming back.
What’s the Cause of Shin Splints?
If you’ve had shin splints before, you know the frustration well. This injury happens when you place excessive stress on the muscles and bone tissue in your lower leg, particularly along the distal third of the tibia. It’s your body’s response to being asked to do too much, too soon.
Activities like running, dancing, or jumping create micro-tears and inflammation, leading to that familiar pain. But why do some people get them while others don’t? Several factors can increase your risk.
- Training Errors: The most common cause is a sudden increase in activity level. A 2024 article from Nike recommends following the “10% rule,” which suggests increasing your weekly mileage by no more than 10% to allow your body to adapt.
- Improper Footwear: Worn-out shoes lose their cushioning and support. Experts advise replacing running shoes every 300-500 miles to prevent injuries.
- Foot Mechanics: Overpronation, where your foot rolls inward excessively upon landing, is a significant contributor. A gait analysis at a specialty running store can determine if you overpronate and need stability shoes or orthotics.
- Muscle Imbalances: Weakness in the shin muscles (tibialis anterior) or tightness in the calf muscles can disrupt normal mechanics and place extra strain on the tibia.
Fortunately, you can address many of these causes with the right stretches and strengthening exercises.
Stretches for Shin Splints
While ice and rest are crucial first steps, a consistent stretching routine can make a significant difference in your recovery. Targeted stretches for shin splints help relieve tension in the overloaded muscles of the lower leg.
Related Article: Increase Flexibility with These Stretching Techniques
Here are some of the most effective stretches I recommend to my clients. By incorporating these into your routine, you can ease your current pain and build the resilience to prevent future flare-ups.
1. Calf Stretches
This classic stretch targets the gastrocnemius, the larger of your two calf muscles. Tightness here can alter your running mechanics and overload your shins.
- Stand facing a wall with your hands placed on it for support.
- Step one leg back, keeping it straight with your heel firmly on the ground.
- Bend your front knee and lean forward until you feel a gentle stretch in the calf of your back leg.
- Hold this position for 30 seconds.
- Repeat on the other side. Aim for 2-3 sets per leg.
2. Toe Raises
This is less of a stretch and more of a strengthening exercise for the tibialis anterior, the muscle on the front of your shin. A stronger tibialis anterior provides better control when your foot hits the ground, reducing stress on the shinbone.
- Sit in a chair with your feet flat on the floor.
- Keeping your heels down, slowly lift your toes toward the ceiling.
- Hold for a few seconds at the top, feeling the muscle in your shin contract.
- Lower your toes back down with control.
- Perform 15-20 repetitions for 2-3 sets. To progress this exercise, you can perform it standing or even add resistance with a band.
3. Soleus Stretch
The soleus muscle lies underneath the gastrocnemius and plays a major role in shock absorption. Many people neglect this muscle, but stretching it is vital for shin splint relief.
- Assume the same starting position as the standard calf stretch, facing a wall.
- Step one foot back, but this time, slightly bend the back knee while keeping your heel on the ground.
- You should feel a stretch lower down in your calf, closer to the Achilles tendon.
- Hold for 30 seconds.
- Switch legs and repeat, completing 2-3 sets for each leg.
4. Ankle Dorsiflexion Stretch
This stretch directly targets the muscles on the front of your shin, helping to relieve tension and improve ankle mobility.
- Sit on the floor or the edge of a chair.
- Extend one leg out in front of you.
- Loop a towel or resistance band around the ball of your foot.
- Gently pull the band towards you, flexing your foot and feeling a stretch along the front of your shin and ankle.
- Hold for 30 seconds.
- Repeat 2-3 times on each leg.
Always perform these stretches gently. You should feel a pull, not sharp pain. Bouncing can cause further irritation, so hold each stretch in a static position.
Related Article: Dynamic Stretching — The Vast Advantages and How to Apply Them
It’s best to do these stretches after a workout when your muscles are warm. Combining them with other recovery tools like a foam roller, massage guns, or simple icing can accelerate your recovery.
How to Utilize Stretches for Shin Splints
To get the most out of these stretches for shin splints, consistency is key. Integrating them into a broader recovery and prevention strategy will give you the best results.
- Timing is Everything: Perform static stretches like these after your workout when your muscles are warm and pliable. Before a workout, focus on dynamic movements like leg swings and butt kicks to prepare your body for activity.
- Be Consistent: Aim to perform these stretches daily, especially if you are currently experiencing pain. Complete two to three sets of each stretch, holding for the recommended time.
- Combine with Other Methods: Don’t rely on stretching alone. Pair your routine with other proven recovery methods. Using a foam roller on your calves before stretching can help release tight spots. Applying an ice pack for 15-20 minutes after activity can reduce inflammation.
- Listen to Your Body: Gradually increase the intensity of your stretches over time. If you feel sharp pain, back off immediately. Pain is a signal to stop, not to push through.
Who Typically Suffers from This Condition and Can Benefit from Stretches for Shin Splints?
Shin splints are most common in people who participate in high-impact, repetitive activities. This includes runners, dancers, and military personnel. However, anyone who rapidly increases their activity level can be at risk.
Certain biomechanical factors also make some individuals more susceptible. These risk factors create a perfect storm for developing this painful condition, making stretches for shin splints even more important for these groups.
A systematic review found that key risk factors include an increased BMI, a previous history of shin splints, and biomechanical traits like a larger “navicular drop,” which is a measure of how much your arch collapses when you stand.
Individuals with flat feet or those who overpronate are particularly prone to shin splints because these conditions can increase stress on the lower leg muscles. A study highlighted in a 2025 article noted that women may be at a higher risk, partly due to differences in bone density and biomechanics.
Preventing Shin Splints
In my experience as a coach, prevention is always the best medicine. Once you’ve recovered, the goal is to make sure shin splints don’t come back. Here are the most effective strategies.
- Gradual Progression: Don’t increase your training volume or intensity by more than 10-15% per week. This gives your bones and muscles time to adapt to the new stress.
- Invest in Proper Footwear: Get your gait analyzed at a specialty running store to find shoes that match your foot type. Remember to replace them every 300-500 miles.
- Incorporate Strength Training: Don’t just focus on stretching. Strengthening the muscles of the lower leg is critical. In addition to toe raises, add exercises like heel walks and single-leg calf raises to build a resilient foundation.
- Prioritize Recovery: Ensure you have adequate rest days in your training schedule. This is when your body repairs and gets stronger.
- Consider Cross-Training: Break up the repetitive stress of running with low-impact activities like swimming or cycling. This maintains your cardiovascular fitness without pounding your shins.
- Listen to Your Body: At the first sign of pain, reduce your activity. Trying to “run through” the pain often turns a minor issue into a major one that could lead to a stress fracture.
The Takeaway
Shin splints are a frustrating injury, but they are both treatable and preventable. By understanding the root causes, you can take control of your recovery and long-term health.
Incorporating these specific stretches for shin splints into your routine is a powerful step. When you combine stretching with smart training, proper footwear, and targeted strength exercises, you build a resilient body that is less prone to injury.
Listen to your body, prioritize recovery, and you can continue to perform at your best, pain-free. Keep your shins healthy so you can keep doing what you love.

FAQs About Stretches for Shin Splints
Can I run through shin splints?
I strongly advise against it. Pushing through the pain can delay healing and, in the worst-case scenario, can lead to a tibial stress fracture. A stress fracture is a much more serious injury that requires a significantly longer recovery period, sometimes involving a walking boot for several weeks.
How long does it take for shin splints to heal?
Recovery time varies depending on the severity. Mild cases might feel better within a couple of weeks with proper rest and care. More severe cases can take three to six months to fully resolve. The key is to address the issue as soon as you feel pain.
When should I see a doctor for shin pain?
You should see a doctor if the pain is severe, doesn’t improve after a few weeks of rest, or if you experience pain even when you’re not active. A healthcare provider can perform an exam to rule out other issues like a stress fracture or compartment syndrome and provide a proper diagnosis.


*Disclosure: This article may contain affiliate links or ads, which means we earn a small commission at no extra cost to you if you make a purchase through these links. These commissions help support the operation and maintenance of our website, allowing us to continue producing free valuable content. Your support is genuinely appreciated, whether you choose to use our links or not. Thank you for being a part of our community and enjoying our content.
PLEASE CONSIDER SHARING THIS ON YOUR SOCIAL MEDIA TO HELP OTHERS LEARN MORE ABOUT THIS TOPIC.